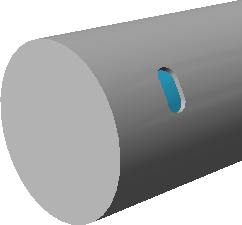
Let's make Windows!
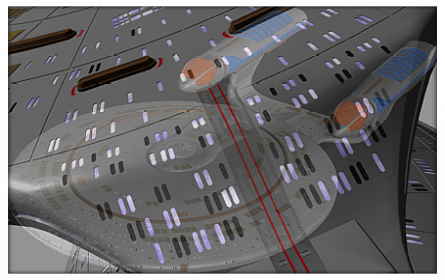
I am going to outline a few methods of making windows in this tutorial for you. The first will deal with placing windows painlessly onto flat hulls. The second section will deal with placing windows on a circular Trek type hull and the 3rd section will deal with placing windows on an elliptical Trek type hull. And there will also be a bonus section on placing windows on Weird hulls! First off let's deal with a nice flat hull -
First make yourself a long rectangular box in layer one in Modeler like so:
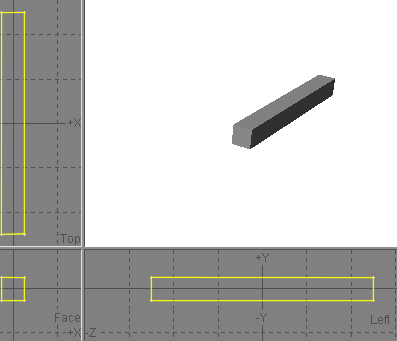
You next task then is to create your window - the shape of your window is really a matter of taste; I went for the following shape - when you make the window make it in the left view - like so and then multiply Clone a few copies of it along the length of your rudimentary hull. You're aiming for something like this:

There are 2 methods of doing what we are going to do next but the one I'm going to outline is by far the easiest. Now this is the important bit - ensure that the window polygons are nowhere near the polygon surfaces you are going to use them on - so offset them on the x-axis until they are away from both hull sides like so.
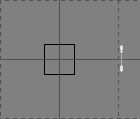
Now swap layers - the key setup for this is usually the comma key next to the semicolon. Select the two polygons that make up the side of your hull and then hide the rest using the "-" {minus} key. Try and get into the habit of always selecting the polygons that you want to affect - hiding the rest is optional but on large models easier on your eyes. You effectively tell Lightwave which polygons it must then affect with the next operation - not only saving you time but also your computer and getting in this habit also makes the risk of error far less. The process we are going to use is Tools - Drill - shortcut key is "R". You will be faced with a menu looking like this:
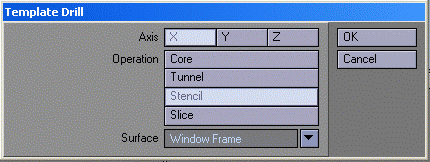
We are going to use the Stencil command - as you may have noticed - now we want to stencil the window polygons with a different surface name so that we can pick them from the other polygons later with greater ease - so do as I have done and type in the name of your new surface and then click create - or alternatively if you have already got a pre-made window frame surface in Modeler choose that from the drop down surface list - then simply press OK.. You will now have effectively stencilled or "painted" the window frame surfaces onto your hull object like so:
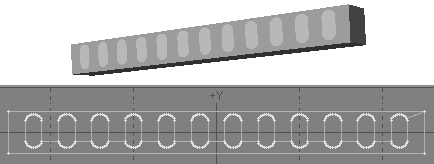
Now comes the nifty bit -- bring up your statistics window - I have configured mine to a different button but it is usually "w" . From here go to polygon mode and then select the Window frame surface - with the polygons that make up that surface now actively selected; perform a smooth shift function or even with straightforward flat planar polygons like this you could use the Boolean function. Move the window frames back a suitable amount into your hull - the dimensions will depend on the size of your object - aim for something like I've shown in the next image. Once you have made your window recess which will now handily be called Window Frames - all you have to do is now apply a new surface to the still selected polygons - Windows would be a good name! If all went well you will have this result on both sides of you hull:

Right that's flat surfaces done with now for something a little bit harder:
SECTION TWO
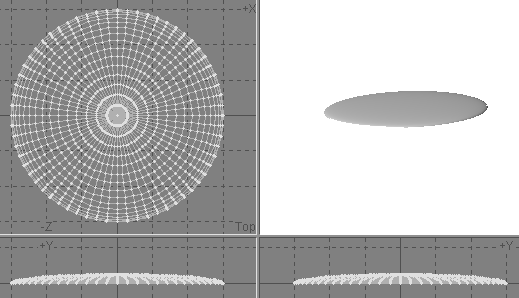
First make a regular saucer shaped object - nice and symmetrical - again dimensions are totally up to you - this isn't a hand-holding tutorial rather one specifying a particular technique. Aim for a similar object to the one in the next image - you can make and then squash a sphere or use the lathe tool. For the purpose of this tutorial delete the bottom half as we won't need it. Were you to make a standard Trek type hull you would cut and copy this to another layer for separate detailing.
The next step is to place your window stencils in the correct starting point for the subsequent operation. If you look at the next image you will see I have placed 3 in line at the front of the saucer. As before have the saucer in the background layer for this operation and when you have positioned your stencil objects move them up the Y axis so that they are well clear of the background surface that will be affected.
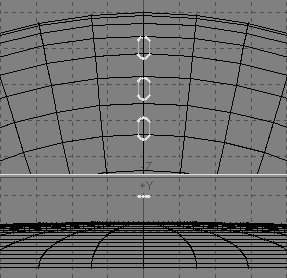
Now perform a multiply - Array - With the Radial option. Specify a suitable number of clones of the original and ensure the axis of rotation is Y -- if you have made yours like mine and that all the centre co-ordinates are set to Zero. I made my sphere with 64 divisions and adjusted my window to fit twice in each segment so 96 clones should give an even spread here. You'll get something like this:
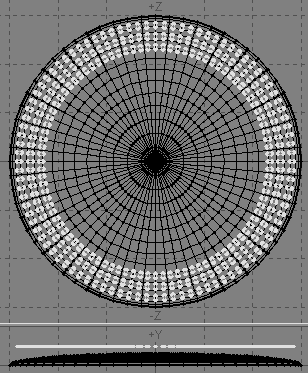
Now at this point you have a few options - it would be rare for ships to have windows in this layout - and the good news is these stencils are single polygons so you can easily select and delete them to your taste to get a nice window pattern for your hull - at this point apply a surface called - you guessed it -- Window Frames to these stencils.
Now exactly as before swap layers and perform the Drill stencil Operation and obviously this time in the Y direction instead. Stop before you do the Smooth shift operation ! It will have to be a smooth shift operation because now the surfaces will be made up of several polygons each instead of just one as in the first section; but I want to cover something else with you before that. If you zoom up real close on one of the now stencilled window frames surfaces you will note that in some places there are points extremely close to each other - on detailed meshes they can be so close as to not be eliminated by a merge even on the absolute setting - and they WILL sometimes cause polygon surface smoothing errors.
Now Lightwave 5.6 and earlier has a point limit ; so this can be a problem also in that arena for detailed meshes. So certain points don't need to be there and if the surface won't be affected that much WELD adjacent points together. We do this at this stage because after a smooth shift we would have a massive amount of these unnecessary points and also polygons as you can imagine on a mesh with many windows! LW6 and above users can leave it be so long as there are no smoothing problems to correct. The points to weld together are these in both cases best to weld points 1 to points 2 as shown below - use your judgement on which point should be the one all others are welded to and remember that the very last point you select is the one in which all the other points will end up being united with to make One single point.
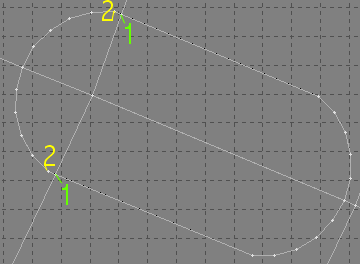
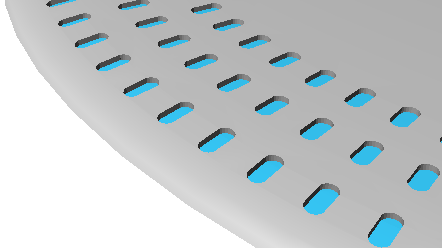
Now we can proceed to make our recesses and windows exactly as discussed previously - BUT first check for 1 & 2 sided polygons with your statistics window - because they will invariably end up being created sometimes due to the point welding clean up process - it can take a while but the effort is worth while! If all goes well you will have a nice set of recessed windows like this:
SECTION 3
This next section deals with how to place our stencils on an elliptical hull. As before create your hull - but this time stretch it on its X axis - so it looks like the enterprise D Hull. Now this is My technique and there may be another way - but this is how I do it. First place your windows stencils in their respective start positions as outlined before. Now make a note of where there are any adjacent cylindrical divisions of the hull that are very close to your windows like so :

You can see in my example that there are two divisions on the hull that are close to my window - these will prove very handy. I'll now select one of these divisions as the basis for a polygon curve .If you select a point and then press the "i" button you will get a little menu that will tell you its EXACT placement in the Modeler universe - using the info you gather on the furthest X points position and the furthest Z points positions - you can easily make a disc to the exact dimensions as the curve you are interested in. Do this in another layer but only use half the number of sides as you did for your hull object. This is because we are going to use the points from this new disc to create a polygon curve. From your new disc select points from just on the x=0 and just after a single quadrant; and make a polygon curve by pressing Ctrl + p -- then select the original disc polygon and delete it to leave you with a solitary curve like so:
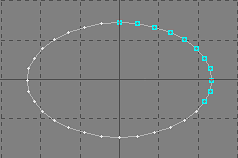
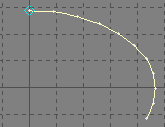
Now place your window stencil object in a foreground layer and the polygon curve in the background - then you go to the multiply menu and click on the Rail Clone button right at the button on the left - you'll get a menu giving you the choice of how many clones you want and whether to do it automatically - via Lengths or via Knots.
hmm what does that mean? Well Automatic and Knots will tend to bunch the objects closer together towards the zenith or highest point of the curve so you'll end up with a denser concentration where a curve reaches its tightest arc and they will space out more and more as the curve relaxes.
For our purposes Lengths is the best option as this will ensure that the spaces between each clone are maintained as a constant. Oriented as you might have guessed will orient the clones with the shape of the curve. Now experiment with the amount of clones until you get a nice density and they packed quite close together - this will involve a few OK and UNDO operations to find a nice balance as its dependent on the dimensions of your hull. When done merely delete any left over from the quadrant and perform two mirror operations to get the other quadrants done like so
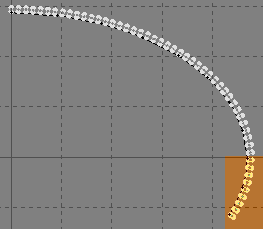
Delete the highlighted "extras" from the final rail clone result
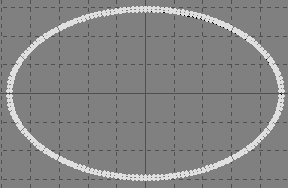
Then perform two mirror operations to achieve the other quadrants These stencils are now ready for use using the methods described previously in windowing up your elliptical hull!

The previous method in the last section can be adapted for use on hulls with weird shapes also - by copying the points directly from the surface of the hull pasting to a new layer - using the set value tool to conform to one point on the y axis or whichever axis you are using; and then creating a polygon curve exactly as discussed previously
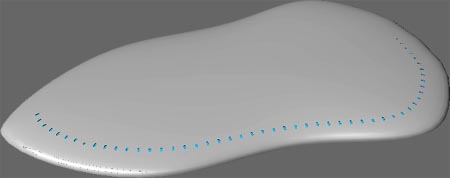
BONUS SECTION
However now you must be aware that if the hull has steep falloff's on the Y axis and you are stencilling in the Y-Axis then obviously windows will end up being stretched - that situation calls for the use of the solid drill tool.
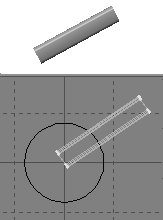
The solid drill tool is very similar in its operation except that now you have to make a solid object as opposed to just a single stencil type polygon. You then intersect the actual surface you want to affect with the stencil object in a background layer - and of course as you can imagine this allows you to orient the cutting or stencilling object to the exact desired angle - study the following images and you'll get the general idea.
Our solid object in the background - angled for the stencil operation using solid drill stencil:
...and then the end result - looking good with no stretching from planar distortion on the awkward surface:
